
Animal fats are a staple in our home. I believe they provide my family with essential nutrients that you can’t get from any other food. Many people today are still under the false impression that consuming fat regularly is unhealthy and they believe the myth that eating fat makes you fat. Countries like France that have the highest consumption rates of saturated fat among its people also have the lowest rates of heart disease. Animal fats like lard are needed for proper brain function, hormone production, protection against inflammation, mineral absorption and are the carriers of important fat soluble vitamins A, D, E and K.
Lard is made from the fat of pigs. When the fat is rendered properly it can be used for cooking and baking. Lard is the fat that for many generations was used and preferred by people before vegetable shortening was invented and mass marketed. Yes that’s right, vegetable shortening like crisco was invented meaning its not real food. It is one of the original processed foods.
The fat used for rendering is either back fat or leaf fat which is the fat surrounding the kidneys of the pig. Many people prefer leaf fat due to the very mild flavor over the back fat. However, if you do use back fat as I did for this post, and strain it early on in the rendering process, you will get a very mild-pure white lard that’s excellent for baking.
Rendering your own lard rather than buying it from the store gives you a choice in where you source your fat from. It’s ideal to buy from a farm that raises pigs on pasture rather than kept indoors their entire lives. This means their fat will be rich with vitamin D and have a healthy omega 6 to omega 3 ratio. Pigs raised indoors and fed mostly grain are under constant stress and have an unhealthy amount of omega 6s. Finding a local farmer that raises happy pigs outside as nature intended will lead to the most nutritious product.

How to:
1. Prepare your slow cooker. First add a 1/4 cup of water to your slow cooker. The water will evaporate and will prevent the fat from scorching early on.
2. Next begin to cut up your fat. You’ll most likely receive your pork fat frozen. Before working with the fat you will need to allow it to thaw slightly but it should still be mostly frozen. If the fat is too warm it will make it difficult to cut up for rendering. Cut the fat into strips and feed it into a meat grinder. If you do not have a meat grinder then cut the fat into 1 inch cubes.

3. Next add the ground or chopped fat to the slow cooker, put the lid on and set your slow cooker on low.
4. As the fat begins to melt you will want to check back every half hour and give it a mix. The timing for rendering all depends on how much fat you are rendering and how full your crock pot is.
5. Once you start to notice a good amount of liquid is forming and you see the fat has turned from pinkish to more translucent, it’s time to strain for the first rendering.

Line your mesh strainer with a cheese cloth, gently pour off the liquid from the slow cooker through the cheese cloth into a mason jar. If any pieces of unrendered fat falls into the strainer, simply pour it back into the slow cooker and continue rendering.

6. You’ll repeat this process a few times over several hours until all the fat is rendered. The amount of renderings you do will depend on how much fat you have and your personal preference. With each rendering the lard becomes less pure.
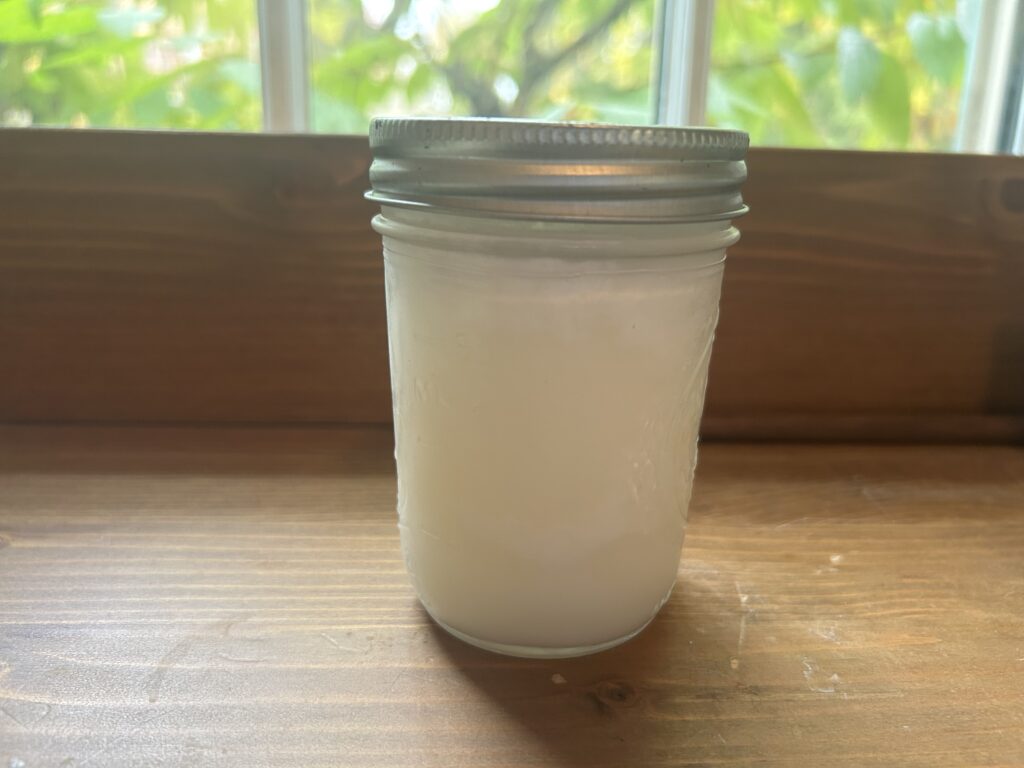
The first rendering gets you the purest lard. This lard is purest white and has little to no flavor. This is best for pie crust and other baked good because you won’t taste that pork flavor. When you first pour off the warm lard it with look cloudy but as it solidifies it will turn white.
The second rendering will have a more yellow tint along with a more porky flavor. I use this to cook up eggs or anything else that’s need a bit of fat.
The third rendering definitely has a yellow tint and a distinct flavor. Add this to anything you want that would benefit from the flavor like chicken or vegetable.

7. You’re all done once most of the fat is melted and you pour off the last of it. I keep my lard in the fridge and it is good for up to a year but it has never lasted me that long. Enjoy!
I know this may seem like a lot of work and perhaps you’re wondering if its even worth it. Many years ago, a teacher of mine imparted a bit of wisdom to me that i’ll never forget, “the magic is in the mundane”. When we slow the beat of our life down just a little bit, tasks like rendering lard, cleaning our kitchen and sweeping the floor become opportunities to access a deeper part of ourselves. A part of ourselves that is grounded and connected. It’s in these places that our hearts open and expand. It’s the magic of our lives hidden in plain sight but can be felt by all those around us.
Leave a Reply